> ## Documentation Index
> Fetch the complete documentation index at: https://cometchat-22654f5b-docs-angular-v5-docs-update.mintlify.site/llms.txt
> Use this file to discover all available pages before exploring further.
# Increment App Icon Badge Count
> Guide to implementing app icon badge count updates using Notification Service Extension in iOS.
* **Requires:** UNNotificationServiceExtension target in your app
* **Purpose:** Update badge count when push notification received
* **Implementation:** Override `didReceive(_:withContentHandler:)` in extension
* **Related:** [Push Notifications](/notifications/push-overview) · [Prepare for Background](/sdk/ios/prepare-your-app-for-background-updates)
This guide helps you set up an incremented badge for the app icon using **Notification Service Extension**.
***
## UNNotificationServiceExtension
This service grabs the data from the push notification payload, the user can modify its content and display the customized data on to the push notification.
In our case, we are modifying the data of the push notification and incrementing the badge count when a new push notification is received.
***
### **Step 1: Add UNNotificationServiceExtension inside the app.**
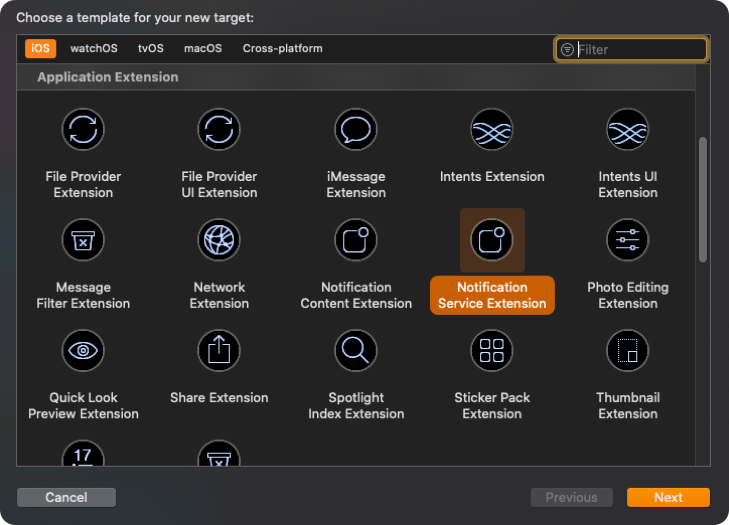
1. Click on `File` --> `New` --> `Targets` --> `Application Extension` --> `Notification Service Extension`.
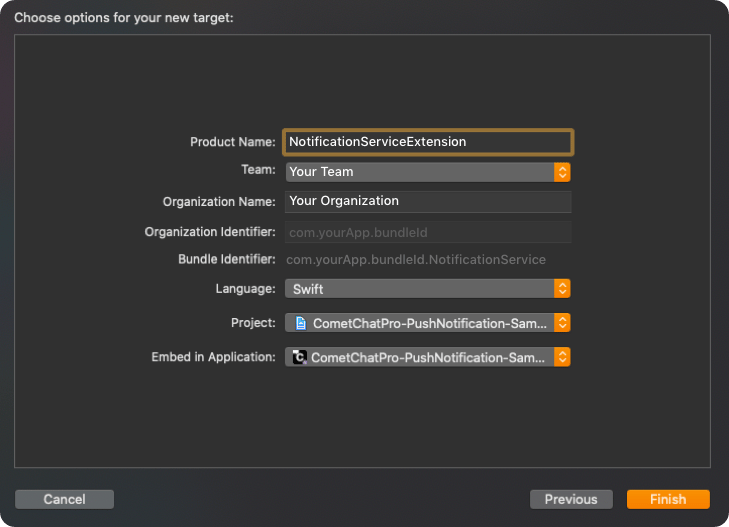
 2. Add `Product Name` and click on `Finish`.
 ***
### **Step 2: Setup App Groups.**
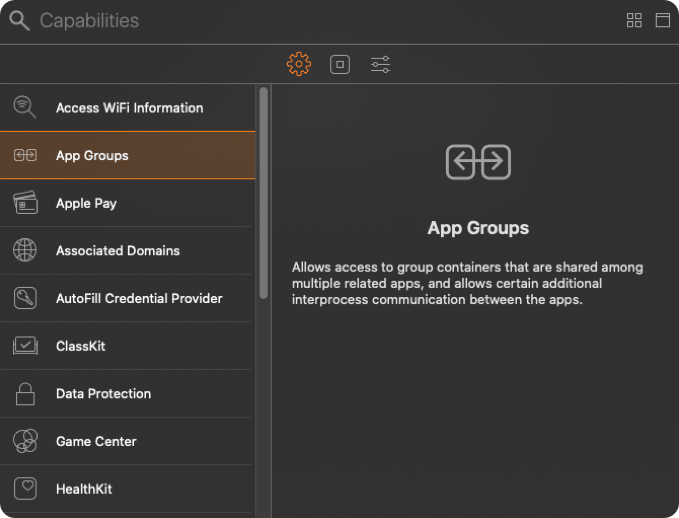
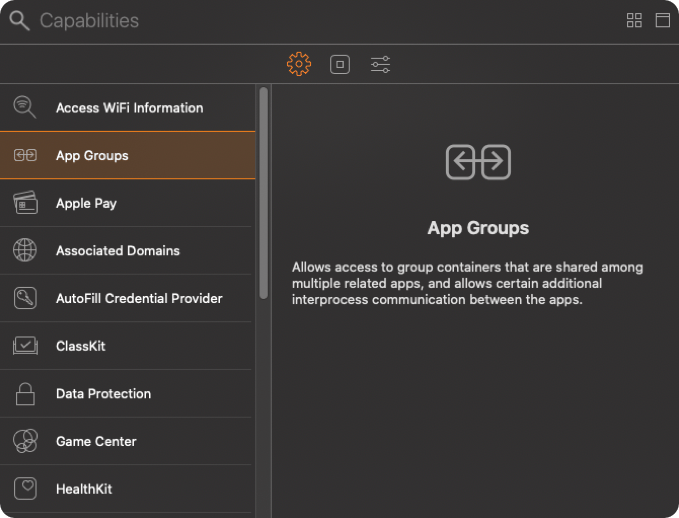
1. Click on `Project` --> `Targets` --> `Your app Target` --> `Signing & Capabilities` --> `[+]` --> `App Groups`.
***
### **Step 2: Setup App Groups.**
1. Click on `Project` --> `Targets` --> `Your app Target` --> `Signing & Capabilities` --> `[+]` --> `App Groups`.
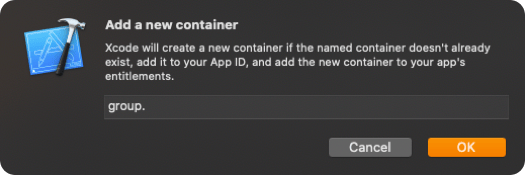
 2. In App Groups, click on `[+]` --> `Add a new container` --> `Enter group name` --> `OK`.
Kindly, create a group name using the combination of 'group' and 'App's bundle identifier' i.e `group.com.yourApp.bundleId`.
2. In App Groups, click on `[+]` --> `Add a new container` --> `Enter group name` --> `OK`.
Kindly, create a group name using the combination of 'group' and 'App's bundle identifier' i.e `group.com.yourApp.bundleId`.
 3. Make sure you've selected the app group which you've created earlier.
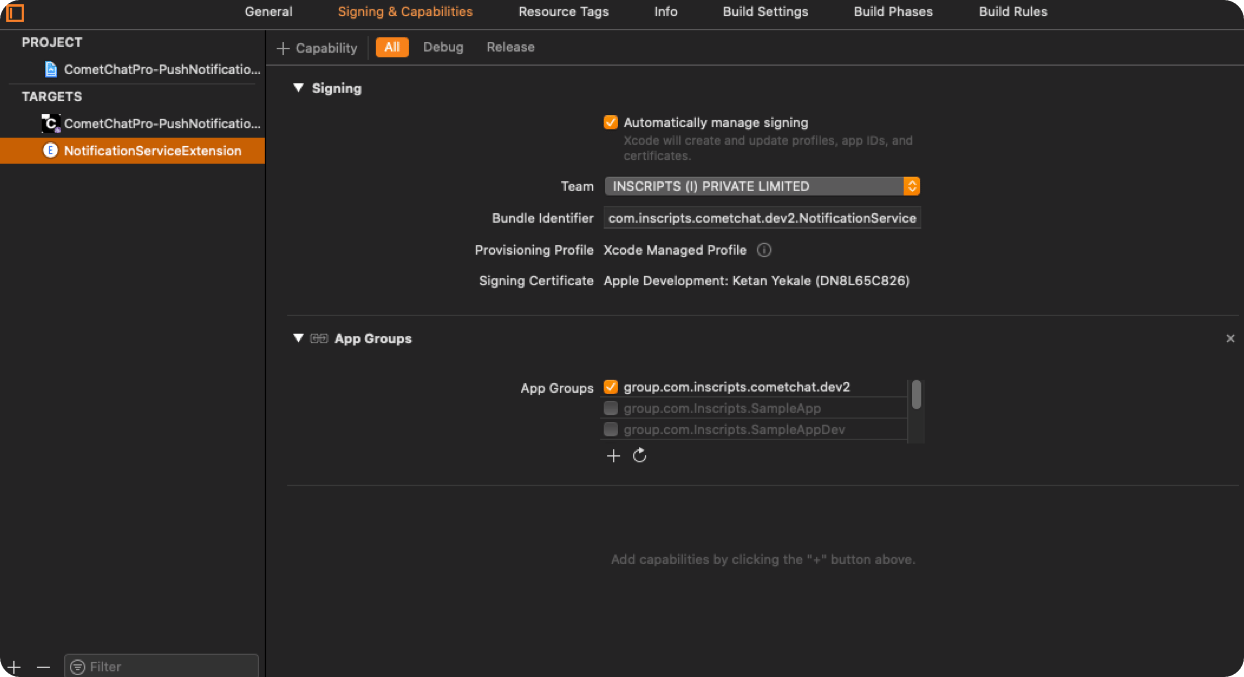
4. Click on `Project` --> `Targets` --> `Notification Service Extension Target` --> `Signing & Capabilities` --> \[+] --> `App Groups`.
3. Make sure you've selected the app group which you've created earlier.
4. Click on `Project` --> `Targets` --> `Notification Service Extension Target` --> `Signing & Capabilities` --> \[+] --> `App Groups`.
 5. Select the same App Group which you've created in `Your app Target`.
 ***
### Step 3: Setup user suit for storing badge count.
1. Open `AppDelegate.swift` and add below code in `applicationWillEnterForeground(_ application: UIApplication)`.
```swift theme={null}
func applicationWillEnterForeground(_ application: UIApplication) {
UserDefaults(suiteName: "group.com.yourApp.bundleId")?.set(1, forKey: "count")
UIApplication.shared.applicationIconBadgeNumber = 0
}
```
***
### Step 4: Setup Notification service extension to increment badge count.
1. Open `NotificationService.swift` and replace the below code in it.
```swift theme={null}
import UserNotifications
class NotificationService: UNNotificationServiceExtension {
var contentHandler: ((UNNotificationContent) -> Void)?
var bestAttemptContent: UNMutableNotificationContent?
let defaults = UserDefaults(suiteName: "group.com.yourApp.bundleId")
override func didReceive(_ request: UNNotificationRequest, withContentHandler contentHandler: @escaping (UNNotificationContent) -> Void) {
self.contentHandler = contentHandler
bestAttemptContent = (request.content.mutableCopy() as? UNMutableNotificationContent)
var count: Int = defaults?.value(forKey: "count") as! Int
if let bestAttemptContent = bestAttemptContent {
bestAttemptContent.title = "\(bestAttemptContent.title) "
bestAttemptContent.body = "\(bestAttemptContent.body) "
bestAttemptContent.badge = count as? NSNumber
count = count + 1
defaults?.set(count, forKey: "count")
contentHandler(bestAttemptContent)
}
}
override func serviceExtensionTimeWillExpire() {
if let contentHandler = contentHandler, let bestAttemptContent = bestAttemptContent {
contentHandler(bestAttemptContent)
}
}
}
```
## Refer Sample App
We have implemented it in our push notification sample app. You can download the sample app.
[Download Push Notification Sample App](https://github.com/cometchat-pro-samples/ios-swift-push-notification-app/archive/master.zip)
Or else [view it on Githhub](https://github.com/cometchat/cometchat-push-notification-app-ios).
***
## Next Steps
Set up push notifications for your iOS app
Mark messages as delivered via push notification
Programmatically remove delivered notifications
Keep real-time connection alive in background
***
### Step 3: Setup user suit for storing badge count.
1. Open `AppDelegate.swift` and add below code in `applicationWillEnterForeground(_ application: UIApplication)`.
```swift theme={null}
func applicationWillEnterForeground(_ application: UIApplication) {
UserDefaults(suiteName: "group.com.yourApp.bundleId")?.set(1, forKey: "count")
UIApplication.shared.applicationIconBadgeNumber = 0
}
```
***
### Step 4: Setup Notification service extension to increment badge count.
1. Open `NotificationService.swift` and replace the below code in it.
```swift theme={null}
import UserNotifications
class NotificationService: UNNotificationServiceExtension {
var contentHandler: ((UNNotificationContent) -> Void)?
var bestAttemptContent: UNMutableNotificationContent?
let defaults = UserDefaults(suiteName: "group.com.yourApp.bundleId")
override func didReceive(_ request: UNNotificationRequest, withContentHandler contentHandler: @escaping (UNNotificationContent) -> Void) {
self.contentHandler = contentHandler
bestAttemptContent = (request.content.mutableCopy() as? UNMutableNotificationContent)
var count: Int = defaults?.value(forKey: "count") as! Int
if let bestAttemptContent = bestAttemptContent {
bestAttemptContent.title = "\(bestAttemptContent.title) "
bestAttemptContent.body = "\(bestAttemptContent.body) "
bestAttemptContent.badge = count as? NSNumber
count = count + 1
defaults?.set(count, forKey: "count")
contentHandler(bestAttemptContent)
}
}
override func serviceExtensionTimeWillExpire() {
if let contentHandler = contentHandler, let bestAttemptContent = bestAttemptContent {
contentHandler(bestAttemptContent)
}
}
}
```
## Refer Sample App
We have implemented it in our push notification sample app. You can download the sample app.
[Download Push Notification Sample App](https://github.com/cometchat-pro-samples/ios-swift-push-notification-app/archive/master.zip)
Or else [view it on Githhub](https://github.com/cometchat/cometchat-push-notification-app-ios).
***
## Next Steps
Set up push notifications for your iOS app
Mark messages as delivered via push notification
Programmatically remove delivered notifications
Keep real-time connection alive in background